Showing posts with label how to. Show all posts

Wednesday, March 4, 2015

How to Peel an Egg?!


Scrolling through my Facebook feed the other day, I came across a video a friend had posted. I wasn't in a place where I could watch it without getting stares, so I clicked the "save" button. For the record, this is my new favorite feature of Facebook. Clicking "save" is great for those times when my FB feed decides to reset itself, or I accidentally minimize my screen, then forget and close it out, or even when my son decides now is a good time to run in the room and jump on me during a Walking Dead trailer.

But I digress.

The real reason I'm writing, is to tell you that eggs can be my kitchen nemesis. If I purchase a six-pack of eggs (also known as a half dozen), my husband then decides that he should make a seven layer cake. If I buy a dozen, eight of those eggs go unnoticed and end up in the trash days after expiring. This week's flub was that I had bought a dozen organic, free-range eggs while doing weekly shopping, only to come home the next day to a second dozen of eggs. "Are you planning on an Easter egg hunt, honey?" I asked innocently. 
"I didn't know you bought eggs, and I bought some today," my dear husband replied.
SMH. 

I can't win.

So today I decided that eight of those little huevos needed to be boiled. When they were ready, I remembered that I had "saved" a video about how to peel boiled eggs. I watched it. I was in awe. I HAD to try it. And guess what? I made mess. It didn't peel any different than had I not placed water in the glass. Typical me. I can't win in the kitchen. 

So I tried again.

This time, I didn't turn the glass sideways, and I added less water. What do you know? Turning it sideways only spun the egg around in a vortex of shell and water. But turning the glass completely over with less water, worked! I highly recommend this method of peeling your hard boiled eggs.

Now if only I could figure out how to correctly determine how many eggs I'll need for the week.


Here's the video I watched:

Friday, July 18, 2014

How To Secure PDF Files Using PowerPoint

I'm always up for learning new things. And I'm always up to share the things I learn. For example, I try and learn something new every day. Yesterday, I learned that I like to bake chocolate cake with my son. I also learned that a can of chocolate buttercream frosting can actually cut your bare foot when dropped.

Lessons aside. Let's talk about something a little less painful. Securing PDF's. I always thought that by having my PowerPoint projects saved to a PDF meant that they were secure. Oh how I was wrong!  Apparently, there are some people in this world who like to steal. And a PDF is no match for those who really want the clip art, digital papers, and fonts. However, there is a way around this...at least for now.

I've created a video tutorial that you can watch that shows you exactly what I'm talking about. Just click the picture below. Happy securing! :^D


Tuesday, July 8, 2014

Using MP3s in the Classroom (Step 1)

I am a music fan. Always have been. Not sure if it was because I was born into a family who always were in a band when I was growing up, or if it was because I just like music. Either way, music ROCKS! (see what I did there?)

So I try and instill the same love of music to my son and to my students. In talking with a friend about her students' behaviors, she mentioned using music cues for transitions. I had used a palm tree that plays music, but hadn't used it for anything more that station rotations.

She created an ActivInspire flip chart on her Promethean Board that had more than one song. She said her voice is saved, her sanity is saved, and the kids actually respond to it.

GREAT! I decided to make one. And by golly, if she wasn't right!

The first step is to create an MP3 of a song that you like. And this video tutorial will tell you just how to do that if you don't already have an MP3 song on hand.

Sunday, July 6, 2014

How To Format Your PowerPoint Slides to Portrait

Much like many of my Teachers Pay Teacher'ers, I'm gearing up for my Las Vegas trip this week. I am excited to be going with my friend Mercedes Hutchens from Surfing to Success. She is a wealth of knowledge on Vegas. She has created an amazing FREEBIE for those of us (like myself) who have never been!


So with that in mind, it got me to thinking (aside from the fact that I've seriously been neglecting my blog lately) that there are tutorials I haven't gotten around to yet. I've been asked several times "How do you set up PowerPoint to make worksheets?" Well, here's my latest video tutorial on how to do just that!

Monday, October 14, 2013

How To Download a Video From You Tube


Like many teachers, I enjoy using videos in my classroom. You Tube has a wide variety of video resources for classroom use. However, a teacher must ALWAYS watch the video without the students around before showing the students the video. Many times a harmless video is actually a spoof with inappropriate content.

Another annoying feature of You Tube is the ads that randomly pop up moments before your video is to begin. You're able to skip them, but not without waiting for the "skip" pop up to show. 

And don't EVEN get me started about the "you might like" or "trending now" videos that show to the right of your screen. When I'm showing an appropriate video, inappropriate videos pop up there!

AND...it's on the INTERNET, so buffering is always happening. How frustrating!

Well, to get the hassles out of You Tube, you can simply download the video you want! No more pop ups, ads, or waiting for buffering and interrupted video time. This video tutorial shows you step by step how to download videos from the web!


Sunday, October 13, 2013

ActivInspire Basics--Video Tutorial


I've learned so much since I began working at my current school. We are a magnet for technology and so I'm constantly on the look out for ways to incorporate technology into my daily teachings. ActivInspire for my Promethean Board is AMAZING! I thought I loved PowerPoint until I met ActivInspire. Using it, allows me to create fun and interactive "flip charts" for my students and me to use. And now that I'm able to do video tutorials, I'm including some ActivInspire basics tutorials on my blog. Today's basics video (although nine minutes long), shows you how to add tools to your toolbox, how to add more colors to your toolbox, how to lock objects, how to duplicate objects, how to manipulate slide layouts, and what the blue/orange button at the top means. Enjoy!


Saturday, October 12, 2013

How To Save a Document as a PDF


When working on a document that you don't want other people to be able to manipulate, or take your work and use it elsewhere, it's always a good idea to save the document as a PDF. You'll need Adobe in order to open the file, so be sure to download that before you save your work. Here is a screen tutorial of how to save your file as a PDF:


Monday, July 29, 2013

How To Change Your Font Using Digital Papers

Sometimes we do things that we don't even realize come as second nature to us. As I click around different blogs and stores, I'm always amazed at the creativity people have! They make it look so easy! Last night as I was creating, I saw something I hadn't realized was available for me to use. Huh? Let me  explain.

When I use PowerPoint, I like to make borders for the things I'm creating. And since I've done it so many times, it doesn't seem too difficult/tedious anymore. So when I'm clicking on things, I generally am clicking so fast, I don't realize there are other options! Last night, I saw an option that I've never explored before. "Format Text". This little beauty has opened my eyes to more creativity. I feel like I've explored a new land. 

"Format Text" allows you to not just change the color of the font you're using, but use patterns (i.e. digital papers) as the text color! AMAZING FIND! Here I will walk you through step-by-step how to format your text using digital papers. You can download it for free (PDF form) here.


I hope this "how to" inspires you to create something new and exciting!

Tuesday, February 26, 2013

Fast Pass and Secret Person: How To Stand In Line


Standing in a line is such a huge deal for first graders. Seriously. Like, as important as what superhero is on the backpack. Or what flavor cupcakes to bring to the monthly birthday celebration. Or who to sit by at lunch. Like, that serious.

So when my students are standing in line and not able to function at a first grade level, I've had to come up with tricks. Here is a list of my "Fix-Its":

  • H.A.L.L.S.: At the last school I worked at, we had the acronym HALLS which stands for Hands at your side; All eyes forward; Lips sealed; Low speed; Space. I've carried that with me to my current school. As students are lining up, I say, "Show me HALLS" and then repeat what each one stands for. Most are able to show me HALLS with just saying HALLS. Some still need the reminders.
  • Caboose: To curb some of the "I-don't-want-to-be-in-back" issues, I created a job called "Caboose". The caboose's job is to be at the end of the line. They are also in charge of closing the door as we all leave.
  • Fast Pass: I get much better results focusing on the positive. When I see a student doing a good job, I'll say  "_____, you may have a fast pass." This bumps them to the front of the line behind the line leader. I've been known to give 2-3 fast passes in a row and that usually gets everyone's attention.
  • Secret Person: I tell the students, "I'm looking for a secret person. I will think of someone in our class and if they are able to walk all the way from _____ to _____ with zero noise, and showing HALLS, they will earn 2 points for their team. I will not tell you who the secret person is unless they do a good job. I hope it's you!" It's amazing how well this one works. I've even upped it to 5 points and a clip up for the secret person. If the person who I'm secretly monitoring doesn't live up to the expectations, I don't reveal who it was because the class gets angry at the student (I made this mistake the very first time I did that).
  • Cutting in Line: Cutting, or more commonly known as "He cut me!", is annoying for everyone. So my simple fix it? If you complain about cutting, you go to the end of the line with the person who cut. I don't like tattling, and I don't like dishonesty, so they both deserve to be at the end of the line. 
  • Getting out of Line: If a student gets out of line for whatever reason, they lose their spot. If I ask them to get something for me, they may have their spot back. My reasoning? If you did it right the first time, and remembered your sweater/homework/backpack/lunch, etc., you wouldn't have to do it over again. Next time, remember to get it before you get in line.
  • Running: You run? You walk...to the end of the line. And don't stand there waiting for the line to reach you, either. Not gonna fly with me. You walk to the end of the line. Do it right the first time, and you won't have to waste time doing it over.
If you have any helpful tips/tricks about standing in line, I'd LOVE to hear them and try them out. I'm always looking for fresh ideas to keep my kiddos engaged!


Saturday, November 24, 2012

Grab it Button! (A link for a How To)

This week has given me the gift of time. I was able to finish some clip art, post it, pin it, give it away, use it in my classroom, talk about it, and even write about it.

But one thing was missing. I have been noticing that blogs tend to have "Grab it" buttons...and I didn't. I found out that these are a great resource for linky parties.

So I made it a point to find out how to do this and found a great resource. Unfortunately, I didn't see a grab it button on her blog, but I'm posting a link instead:
Code It Pretty Link Here


Don't forget, I'm running sales in both my TPT store and TN store. Join my Giveaway for free Christmas Clip Art!

Friday, November 23, 2012

Containers for Promethean Board (A How To)

As a relative newbie to the world of the Promethean Board, I'm always playing around with ActivInspire to learn new things. About a month ago, I was able to take a class to learn some new techniques for my board that I'd like to share.

The first one is the simplest in ideas, and quite useful, but can become tricky: Containers.

If you've downloaded a flip chart and had an activity that involves sorting, you've probably used containers and didn't know it. Containers are objects that you designate what can be "contained" in them. This allows for instant feedback if a student is sorting. The image being dragged will "snap back" to its original spot if the answer is incorrect.

Before you begin, be sure to click the orange box (see arrow in picture). This allows you to be in design mode. If it is in blue, you can still create, but it won't lock the objects like they need to be locked. Reserve blue for when students are using the board.

To create a container, begin by creating the shape you will be dragging a word or object into. For simplicity's sake, I made a large rectangle.


Next, I use the text tool to label the box of what the students will be dragging into it. Click the arrow tool. Then highlight the box with the label inside it. A menu should pop up at the top of the box. Click on the box with two green squares. This will connect (or group) the box with the label. The benefit of this is that if you need to move the box, the words will go with it. Grouping is one of my favorite features that makes life easier.


Now we want to create what will be going inside the container. You can type a word, have a picture, or create a combination of both. My favorite is to create a combination of both. This makes it easier for the students to drag them to the container. To do this, I create a rounded rectangle, then type a word over it. Then, group them together. We want some words to be correct, and others to be incorrect.


Now comes the tricky part: turning the large rectangle into a container. Click on the square and the menu will pop up at the top. Click on the picture of the words (looks like a file menu), and select "property browser".


Once you've clicked that, another menu should pop up on the left. Scroll down until you see "containers". Click the + sign to open up the containers menu.

A menu should drop down saying "Can contain" and then a menu bar. Click on that bar and select "specific object".


Below this, where it says, "Return if not Contained", select "True". This means that the object you do NOT want in the box, will snap back to its original position.


Next, select the object that is not allowed in the box. For this example, I will be clicking on "cat". When the menu pops up, select the file menu again and then "property browser" just as we did before and go to "Containers". However, this time, you are only going to select "True" in the "Return if Not Contained" section.

Now, to check to see if it works, click on the orange square at the top to get out of design mode. Make sure it's blue now. Click on the objects and drag them into the box. If it is the one you selected as an incorrect box, it should snap right back to its place!

Click here for a FREE word sort download from my TPT store to give you an example of how containers can work in the classroom!


Freebie Fridays

Coffee, Kids and Compulsive Lists
The Teacher Wife
Surfing to Success Tips and Tutorials

Thursday, September 6, 2012

Promethean Board Math (A How To)

Tomorrow will be one week since a Promethean Board was installed in my classroom. And I can't say enough good things about it.
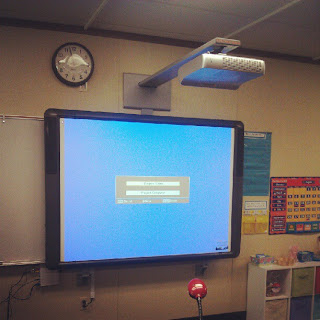
Moments after installation

In playing around with the program ActivInspire I've noticed that my PowerPoint skills have come in quite handy! The flip charts are very similar to PowerPoint.

One of the first ways I wanted to incorporate the board into my daily life was to create a Board Math template for topic 1. To do this, I must first create a "table" in Microsoft Word. 

1. Hit return so that your cursor jumps down one level. I recommend ALWAYS doing this when inserting a table. It will save you headache in the long run should you need to move the table or add a heading at the top.

2. At the top of the screen, click on the "Table" tab and then click "insert", then click "table".
3. How ever many standards you have should be how many columns you need. I use Common Core standards, so I need four columns. Since it's the beginning of the year, I only want about 4 problems per standard. I also want to make sure that I have a row for the title of each standard, so set your rows to 5. Go ahead and leave it set to "auto". Your table should look something like this:

4. Change the layout of your paper to landscape. To do this, click "file" and then "page setup."
Make sure that the picture on the right (where it says "orientation") is highlighted before clicking ok.

5. You should make the table as large as you possibly can without going into the next page. To do this, simply click and drag the bottom right hand corner down to the right.


6. Now hover over the bottom of the line in the top row and then click and drag it up so it is now smaller than the other boxes. 


7. Next, we should make the top row formatted to fit the labels. Starting at the left side top box, left click and drag all the way across the row. All the top boxes should now be highlighted. At the top of your screen, change the font to one of your choice and the size to about 10 and bold. We want the questions in the board math to be bigger than the top labels, so you can play around with the size later. Type in your headings on the top boxes.

Now start from the box below the top box in the left hand corner and do the same highlighting, only this time, go all the way down to the bottom right box. All boxes except the top row should be highlighted. Set these boxes to 20, but not bold (bold takes up too much space).

8. I like to have two word problems for my Operations & Algebraic Thinking column, so I want to merge the boxes. To do that, left click on the second box and highlight to the bottom of the third box, then right click so a menu pops up. Click "merge cells". You should now have two boxes below your far right column.


If you'd like the bottom box larger, simply click on the line separating the two and drag it up like you did to make the top boxes smaller.

9. Now it's time for the fun part. Add all the questions you'd like in each box. Make sure that you don't put specific numbers in. This is one week's worth of board math. You simply erase the specifics each day. The idea is that the students are getting repetition of how to do the problems. Here is what my bare bones Topic 1 (first week) of EnVision Math for first grade looks like:

To make the cup shape, I simply clicked on "insert" then "shape." To change the color, I right clicked on the shape, then clicked on "format shape".


10. Make sure you save your work! BUT we have to save it as a PDF in order to insert it into our flip chart. To do that, at the bottom of the screen when you are at "file" then "save", or "save as", it should say "Format:" Make sure to click "PDF". This saves it sort of like a picture that cannot be changed. Close the file when done.


11. Next, open your new flip chart. Click on "import". This is important! Do not click "insert". It will not let you insert the PDF, only a picture of a PDF file. Once you click "import", then click on your file that has "PDF" attached to the end of it. If you open the file with "doc" at the end, it's not going to work. It should look something like this:


12. Last, to jazz up my board math, I've add shapes that act as manipulatives for some problems, and then used squares to make the data chart. These can be duplicated by clicking on them the click "duplicate" so that if I need more, they are the same size/color.
Here is my finished product!


13. AND very last...BE SURE TO SAVE IT!!! I'm always the one who saves saves saves, then suddenly forgets to save and then something happens....in fact, that happened while I was typing this blog entry! Yeesh...some teachers never learn!


TBA's Ultimate Linky Party
You Might Be a First Grader...
Surfing to Success Tips and Tutorials

Wednesday, July 25, 2012

How To Make a Border Using PowerPoint (Mac)

So the newest rage among my teacher friends is to create borders using PowerPoint. HOWEVER, it seems to be a hidden secret because most people want to sell them online. So I did a tiny bit of research today and discovered the newest rage is pretty simple!

1. Open PowerPoint to a new presentation. Make sure you don't have a background, it's just a plain old white template.

2. Delete any words/text boxes you have. This will make it easier to work with.

3. Click on the "Insert" tab at the top.

4. Scroll down to "shapes". Choose a rectangle.

5. Make the rectangle almost as large as the slide.

6. Click on the "Insert" tab at the top again.

7. Make another rectangle, but slightly smaller than first (inside of the first rectangle).

8. Click on the inside (smaller) rectangle to highlight it. Then where it shows a fill bucket, click it and click on the color white.

9. Click on the area between the two rectangles (should look the start of a border).

10. Where it says, "Fill" (should be the same place as the bucket), click on that. Then click on "Fill Effects".

11.  Click on "Pattern". Choose a pattern. I chose a checkerboard pattern for this.

12. To change the color, click where you have clicked on the pattern, choose "Change background color" and pick your color.

Rather than creating a whole bunch of slides independently, to save you time, click on your slide then choose the "Insert" tab and choose "duplicate slide". Another slide should pop up. To have a different color slide (for selling purposes, say), start at step 9 and continue the process. This will save you a TON of time!

Play around with it, you can even choose a photo you have taken and use it instead of the already created patterns! Enjoy!

Surfing to Success Tips and Tutorials